
What the Certified Pre-Owned Inspection Means for You

Not too long ago, when you went to buy a used car, you were on your own, dealing with a dealership on whatever terms seemed to be usual and customary for your neighborhood. As a result, a number of drivers got burned by fly-by-night used car lots, getting stuck with more lemons than your average citrus orchard. This led to many drivers deciding to buy new cars rather than used, missing out on the opportunity to get a great value vehicle at an affordable price. But the major automakers took note of this and introduced the concept of certified pre-owned cars.
CPO vehicles are used cars that are held to a higher standard, inspected and selected to be the best used vehicles of the manufacturer on the market. Automakers like Chevrolet add great benefits for CPO vehicles like a 6-year/100,000-mile extended powertrain limited warranty, a 12-months/12,000-miles extended new car bumper-to-bumper limited warranty, and a free 3-month trial of OnStar services. In addition, General Motors provides a 172-point vehicle inspection and reconditioning process for all CPO cars, trucks, minivans, and SUVs.
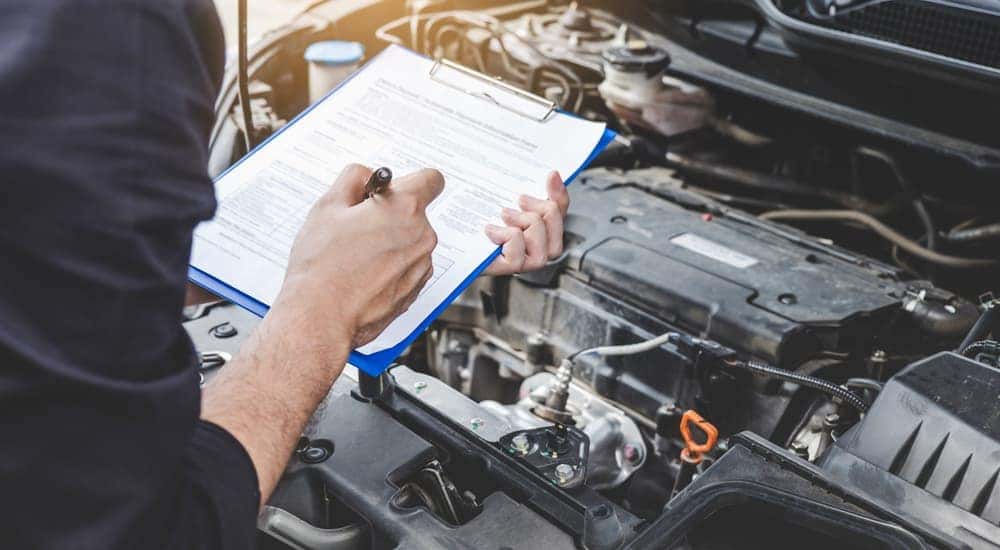
But what is inspected in the CPO process, and what does it mean to you? For Chevrolet, ten different components, each with their own area of focus, are inspected. Everything from the tires and brake pads to the interior and exterior are inspected in the CPO process. For you, this means getting a vehicle that you know is reliable. But there is so much that goes into the inspection process and what makes a CPO vehicle so great. And today, we at DePaula Chevy are going to tell you more about it. So, without further ado, let’s get started.
Step 1: Investigate Vehicle History
The first step in the inspection process is for the dealership to perform a comprehensive investigation of the vehicle history for the CPO car. This will ensure that only the highest quality vehicles are selected for the CPO program. As part of the process, a vehicle history report will be ordered from Carfax or AutoCheck. With this in hand, the dealer can review the vehicle’s history, including any open recalls that will need to be addressed and to ensure there are no defects in the chain of title that can affect your ownership of the CPO vehicle.
The dealer will also check to see if there are any aftermarket modifications to the vehicle and, if so, if they are acceptable. Many aftermarket additions that are not properly installed can adversely affect your car’s performance. And finally, the technician will check all of the car’s trouble codes to make sure there are no issues with the vehicle. The trouble codes can often be the first place to look for any problems that will need to be addressed before the CPO vehicle can be offered for sale.
Step 2: Maintenance Checks
The second step is to make sure that any and all routine maintenance has been performed that would be due by the next scheduled appointment. These include performing an oil change, replacing the oil filter, and inspecting the air/cabin filter, all hoses and clamps, the drive belt, and all wiper blades. The technician will also perform a battery test, clean and secure the battery connections, check the battery tray, retainers, and vent tubes, and perform a full load test.
Finally, the dealer’s trained technician will check, top off or change the power steering fluid, transmission fluid, windshield washer fluid, engine coolant, and brake fluid. By having this routine maintenance performed beforehand, you will have the peace of mind when you leave the dealership that you won’t have to worry about servicing your CPO Chevy vehicle for a while.
Step 3: Tires and Brake Pads
The next step in the inspection process is to look at the tires and brake pads. The dealer will make sure that the vehicle’s four tires are the same matching brand and size. Driving on mismatched tires can do severe damage to a vehicle’s axles, brakes, and drivetrain. This is why all four tires must be matched. In addition, the technician will check to make sure that each tire has a minimum tire tread plane of at least 5/32nds. Having bald tires increases the risk of skidding accidents.
Finally, the brake pads and shoes are checked to determine their remaining size. Chevrolet requires a minimum thickness of friction material of 5mm on front brake pads and 3mm on rear ones. Worn brakes increase your vehicle’s stopping distance as well as the risk of brake failure. So in Chevrolet’s inspection, they ensure the brake pads are safe.
Step 4: Detailing the Vehicle’s Appearance
Next, the dealership will make sure to thoroughly inspect and clean the interior and exterior of the vehicle to make sure that you will be satisfied with its appearance when you drive it off the lot. The interior cleaning includes all carpets, floor mats, and seat covers, the headliner and dash pad, interior trim panels, glass surfaces, trunk compartment and spare cover, the instrument panel, and all storage compartments and ashtrays. If there are any unpleasant odors in the car, the dealer will take steps to remove them.
Concerning the car’s exterior, the dealer will fully wax and wash the car, make sure it is free of dents, remove any staining, clean the tires and wheels, and recondition any surface chips or scratches. You want a car that looks as good as new, and this detailing will make sure that your CPO Chevy is clean, looks great, and smells great too.
Step 5: The Road Test
The next step is the crucial road test. The dealer’s trained technician will start the engine, allow it to idle, put it into gear, and test the engine’s acceleration. Once the technician has the car moving, they will check the engine and transmission’s performance, the vehicle’s stability, its steering, the HVAC system, the headlights, the signals, and the other items on the car. This will tell the technician if there is anything that doesn’t work right or sound right, requiring the vehicle to undergo any repairs or servicing. This road test saves you the time and money of hiring your own mechanic to give your prospective car a test drive.
Step 6: Functional Assessment
Once the technician is satisfied with the vehicle’s operation, the next thing to do is to inspect and verify the operation of all components. If they are not up to snuff, then they will be repaired or replaced. This includes the OnStar system, the SiriusXM radio if equipped, all airbags, the parking brake, any weather stripping, the door reflectors, child safety look, the fuel door and cap, the spire tire and equipment, the alarm, the safety belts, and retractors, any outlets, and the key or key fob as applicable. For you, this means that all items in the car will function as required.
Step 7: Engine Compartment Inspection
It is not enough to give a car a road test; a trained technician also has to perform a comprehensive inspection of the car’s engine compartment. This consists of the brake system, cooling system, ignition system, air conditioner compressor, power steering system, fuel system, vacuum system, and engine insulator and blanket.
If there are any problems, the technician will repair or replace any parts as necessary. They will also check to make sure that the compartment has all proper labels and decals to assist you or whomever you hire to maintain your vehicle. By looking at the engine compartment and its parts, the technician can see any potential problems that weren’t initially revealed in the road test.
Step 8: Under Vehicle Inspection
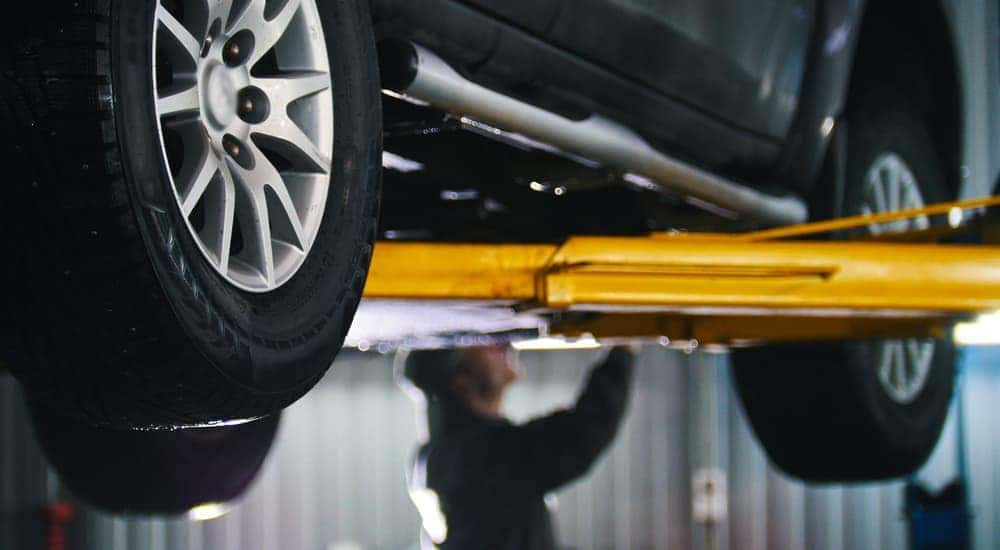
The next stage is a full under-vehicle inspection. This will make sure that there are no fluid leaks. It will also confirm the integrity and operation of the brakes, suspension, drivetrain, frame, and exhaust system. The technician will also check for the presence of any optional items that come with the specific model and trim of the CPO vehicle, including tow hooks, wheel lugs, and air deflector.
Step 9: Interior Components
You want to know that all of the interior features and components will function properly when you buy your CPO car. This is why all such components will be checked for operation and condition, including lighting, seating, interior trim, steering wheel, infotainment system, release levers, mirrors, sunroof (if applicable), and dashboard controls. If anything is not functioning properly, it will be repaired or replaced.
Step 10: Exterior Components
The final step is a full review of all exterior items to make sure they are clean and free from damage. This includes the windshields and windows, all exterior lights, body panels, and wheels. Once the dealer is satisfied that the vehicle is ready to go, it will be classified as part of the Chevy CPO program.
Buying a Chevy CPO Car
You can’t judge a book by a cover, but you can judge a car by whether or not it is a Chevy CPO vehicle. From outside to in, and undercarriage to the engine compartment, a Chevy CPO vehicle has undergone a thorough and complete 172-point inspection, so you will know that you are getting the highest quality used car on the market today. There is used, and then there is Chevy CPO. And you will want a Chevy CPO vehicle.


0 comment(s) so far on What the Certified Pre-Owned Inspection Means for You